EverHopeful wrote:
I didn't understand your description of the plastic block mandrel, which worries me as it sounds like you have a useful technique that I don't know about ...
I know that feeling. Learning stuff is the everyday bonus of which we can take advantage. Sorry I wasn't forthcoming enough in my description. Guess I was feeling guilty for thread-jacking a bit. I'll be posting about it in more detail when I get my 2240 done, adding some pictures to my existing 2240 mod thread. Just waiting for the snail mail to get that HiPAC to be so I can dig in and finish!
The mandrel thing was to form the bottom face of the 3/4" aluminum barrel shroud tube. I made a couple of delrin spacers, one for just ahead of the steel breech and one for part way down the barrel, with the aluminum front cap centering the muzzle. I wanted a long clean line from breech to muzzle, not a skinny looking long barrel. The 3/4" tube worked just right with the breech end counter-sunk to press against the bevelled front edge. But of course with the Crosman steel breech there's no room for the 3/4" tube! So I had to cut it out, I thought initially, sawing all the way down to clear the HiPAC plus an extension. About half the length of the tube. But that job was bugging me. Too hard. Probably slightly messy results as I don't have a mill nor any other obvious way to slot aluminum tubing. Guess I could use a Dremel saw... but that sounded dangerous and noisy and generally obnoxious. So thoughts of alternatives were bubbling around in the back of my mind.
Then it occurred to me one day last week that I could just form that part of the tube, make it concave instead of convex. So I took a short piece and put it in the vise with a dowel inside to maintain round, part of the dowel carved away to allow for compressing that one area. Bashed on it with a ball peen hammer. Made a mess of 4" of tube. So that was a failure. But then I got busier thinking, and the next evening realised I could just make a slippery form with a 3/4" hole in it out of some UHMW polyethylene scrap I picked up at the plastics shop a couple of years ago. It's only 3/4" thick, but perhaps big enough. So I bored a 3/4" hole in it, then a 1/4" hole from one side, then dropped in a round-headed carriage bolt which I turned and polished to match the radius of the Crosman main tube. Popped that in from the inside and snugged it against the hole edge with a nut from the outside. It's offset, about 2/3 of the way through from the side I was going to press into. I braced that against a bench dog and a couple of wooden blocks clamped on each side of the hole, then used my main bench vise (I built a large woodworking bench for myself in about 1988, with two big vises as part of the design - thing weighs quite a lot more than I do) with another bench dog to push the tube right through the plastic mandrel, the relevant path on the tube surface rubbed lightly with moly grease to keep it moving across the steel with no scoring.
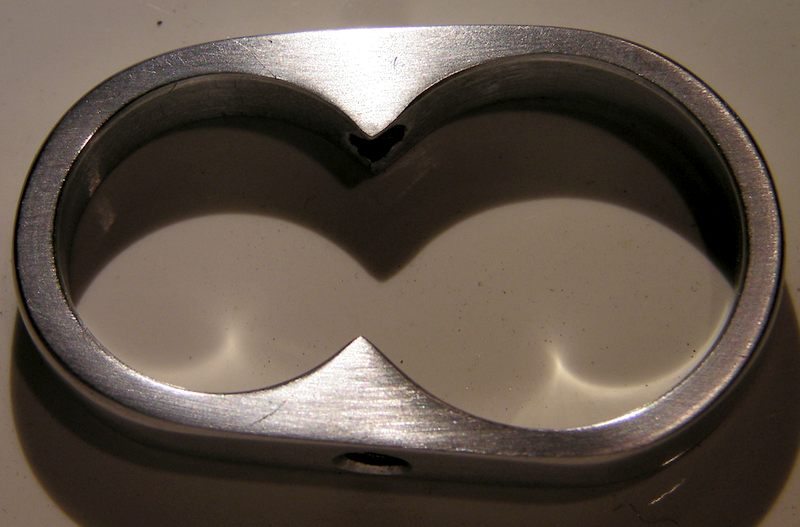
The result was a neat, if ever so slightly spiralling groove along the bottom of the tube. I'd found some forum post somewhere, a helpful fellow offering exact measurements beyond the 2240 tube for various configurations of HiPAC parts. So I knew where to stop the groove. I had to push it through again with some twisting pressure on the tube, part way, to get rid of the spiral which ran for several inches. But not a big change. Just something to watch for next time. A bit of sanding to smooth a few shallow wrinkes and it looks almost good, will look good painted. There's slightly more than enough clearance for a thick layer of paint. Should be no problem mounting and un-mounting the HPA parts for maintenance. And when it's all together with a barrel band out near the fill nipple the concave part of the tube should hardly be noticeable. Anyway, done with the long-winded stuff, here's the picture showing the tool and the mounted tube, the groove to vanish behind the HiPAC once it's on there.

Oh, and the holes in the barrel band were just drilled then chased bigger and bigger until done with a hole enlarging 1/4" square shafted tool, the standard one in the TAIG kit but ground so it can handle starting in much smaller holes.