Canadian Airgun Forum

The #1 Community for Airguns in Canada!
It is currently Fri Apr 19, 2024 1:58 pm

All times are UTC - 5 hours


The Canadian Airgun Forums are a place for people to discuss and learn about airguns and the airgunning sport in Canada. There are lots of discussions about airguns, airgun accessories, reviews, modification and repair information, airgun events, field target and free classifieds!


You need to register before you can post: click the register link to proceed. Before you register, please read the forum rules. By joining our free community you will have access to post topics, communicate privately with other members (PM), respond to polls, upload your own pictures, and access many other special features. Registration is fast, simple, and absolutely free! To start viewing messages, select the forum that you want to visit from the selection below.


Post new topic Reply to topic  [ 95 posts ]  Go to page Previous  1, 2, 3, 4, 5, 6, 7  Next
Author Message
PostPosted: Wed Feb 28, 2018 8:59 pm 
Offline
User avatar

Joined: Sat Nov 03, 2007 4:19 pm
Posts: 9518
Location: Coalmont BC
Final assembly and first shots today.... Yesterday I cut the bolts to length and drilled and tapped them for the bolt handles.... I checked the chambering of all the bullets, and the .257 was OK but the longest 6mm bullet (73 gr.) was too hard to chamber, so I had to shorten the front of the bolt about 0.050" until I could just chamber it.... I then sanded the receivers and cleaned them thoroughly, inside and out.... Today I lapped the bores with JBs Bore Paste and then polished them with Bore Brite.... I made the bolt handles, and cleaned and assembled the uppers for the first time.... Everything worked smoothly, so I measured the required length for the transfer port on the unregulated gun (I'm still waiting for the regulator to finish the other lower).... It turns out the both the 6mm and .257 will require the same length transfer ports, which means I won't have to make multiples, just one for each lower.... The transfer ports are made from a piece of 3/8" OD Teflon rod, drilled out with a size "F" drill (0.257") and faced flat on the ends to the correct length to have about 0.020" of crush for sealing.... That was the last part required, so I was able to bolt the upper to the lower for the first time.... I put the .257 cal upper on the unregulated lower, and here is what it looks like.... The reservoir is 300 cc, and the gun as shown weighs 6 lb. 9 oz.... Using an aluminum reservoir sure makes a HUGE difference to the weight....

Image

Well, the first shot is always an exciting and nervous time.... My Great White was at 3400 psi, so that was the fill pressure I used.... I sized some 82.5 gr. bullets, about in the middle of the weight range I hope to use, set up my Chrony and fired the first shot.... VERY loud, and 978 fps (175 FPE).... I increased the SSG gap from the 1 turn I had it set to, a turn at a time, and it made NO difference to the velocity, so I was firmly up on the plateau, and using a lot of air, the pressure in the Great White dropping a bit with each shot.... Suddenly I got a huge BRRAAAPPPPP which dropped the pressure about 100 psi.... I backed the SSG out a couple more turns, and it did the same thing.... after a couple more big burps, it was time to try something different.... I removed the SSG and set the preload on the 13 lb/in. spring to zero, and reinstalled it with 1 turn of gap.... by this time the pressure was down to just over 3000 psi, and I got a nice sharp report, still pretty loud, and 933 fps (160 FPE).... I started increasing the gap on the SSG, and the velocity stayed the same, but the gun was getting progressively quieter, but still using a lot of air.... Suddenly on one shot, all I got was a click.... Hammer hit the valve, but the gun did not fire.... I started cranking the SSG back in to increase the hammer strike, but even with zero gap, no joy.... I figured something inside the valve had failed, so I degassed the gun and pulled it all apart.... This is what I found....

Image

The slotted wheel on the front end of the valve had sheared, and the sleeve over the poppet was no longer attached to the valve, but travelling with the poppet.... This meant there was no balancing force left on the poppet, so no wonder it would not open with the very light hammer strike.... If you ever need proof that the ART/SS valve reduces the required hammer strike, there it is.... I have tried to wrap my brain around where the force came from that sheared that wheel, and for the life of me, I can't see how there is any force on it, with the poppet free to slide inside it.... but there obviously is.... I am using a stepped poppet, with a 1/4" small end and a 3/8" big end, inside that sleeve, so the difference in those areas creates a balancing force of 184 lbs. at 3000 psi (258 lbs. at my 4200 psi MSWP).... If that force is "lifting" the poppet away from the seat to reduce the 464 lb. closing force (at 4200 psi) to "only" 206 lbs.... then I guess it must be "pulling" that sleeve downwards (towards the seat) with that same 258 lbs. of force (it has to go somewhere).... That was enough to shear the four very thin webs between the slots in the wheel that was holding it....

The first shots met or exceeded my expectations, but time for a redesign of that wheel.... :roll:

Bob

_________________
Dominion Marksman Silver Shield - 5890 x 6000 in 1976, and downhill ever since!
Airsonal; Too many! Springers, Pumpers, CO2, but I love my PCPs and developing them!
Proud Member of the 2000+fps Club!


Top
 Profile  
 
PostPosted: Thu Mar 01, 2018 7:44 pm 
Offline
User avatar

Joined: Sat Nov 03, 2007 4:19 pm
Posts: 9518
Location: Coalmont BC
SUCCESS !!!

I made a new wheel to mount the front of the valve thimble, with eight 5/32" holes (a total area twice the valve throat), and with the center twice as thick and the webs between the hole more than twice as long, and twice as many of them.... I don't think I will have any more problems.... I put the gun back together and filled it, and my Great White is now down to about 2900 psi.... I installed the 6mm upper instead of the .257, using the same transfer port, and it sealed great.... I sized some of the 61.3 gr. Bowman bullets (a Lyman 257420, scaled down to 6 mm) to 0.243", and replaced the hammer spring with the weakest 3" long spring I have, one of 0.055" wire with a rate of 11 lb/in.... I set the preload to zero, the SSG gap to 1 turn, and shot the first 6 mm bullet.... It ripped through the Chrony at 1007 fps (138 FPE).... 8)

The gun was pretty loud, so I increased the SSG gap 2 turns as a time, recording the velocity as I went.... It didn't start to drop significantly until I was 7 turns out, and then it was still 990 fps.... I changed the gap only 1 turn at a time after that, recording the velocity until 14 turns out from zero gap, at which point it did not fire.... Turning it back in just one turn, the gun shot at 800 fps.... So, I had an adjustment range of about 200 fps before the valve fell off the cliff.... I now have a digital pressure gauge, so I put that in between my tank and the gun, so that I could measure the pressure drop per shot to determine the efficiency.... I started at 12 turns of gap (0.428"), filled the gun to the pressure remaining in the tank (2840 psi), closed the valve, let the pressure settle, and then fired one shot, let the pressure stabilze again and recorded the difference in pressure, and the velocity.... I reduced the gap a turn, and repeated the procedure, recording the velocity and pressure drop at each setting until I was back to 1 turn of gap.... Here are the results....

Image

I can't believe how easy the digital gauge makes it to accurately measure the pressure drop for just one shot.... The hardest thing is to try and get the reading at the same temperature each time.... The gauge is soooooooo sensitive that after a shot (which cools the reservoir from expansion of the air during the shot), that you can watch the gauge rise slowly as the reservoir returns to room temperature.... The best way is after you close the tank valve, before the shot, wait a minute or so for the temperature to stabilize, record the starting pressure, take the shot, and then after the shot wait until the gauge has stopped going UP and record that as the end pressure.... and then subtract to get the drop.... From there, my spreadsheet calculates the FPE and FPE/CI, with the only two inputs needed the velocity and pressure drop....

The plateau, at 2800 psi (which is what I had left at the end of the testing), is basically 1000 fps, and the useful knee of the tuning curve runs from 7-12 turns of gap.... With this 61.3 gr. bullet, it looks like about 9 turns of gap (about 5/16") is the sweet spot, giving 960 fps (126 FPE) at an efficiency of 1.24 FPE/CI.... The pressure only drops 80 psi per shot on the 300 cc reservoir, so it will be about twice that on the 150 cc plenum of the regulated version.... That is only about a 6% drop, so I should be able to regulate at the 2800 psi I ran these tests at, at least with this bullet, maybe 100 psi less with the 58.3 gr HP version.... More testing will produce similar information for the other bullet weights I have, but first I have to refill my Great White.... I have a 3000 psi regulator I can tether to, it will be interesting to test the 73 gr. bullet at that pressure.... I will need to get a weaker hammer spring in order to reduce the SSG gap to a more reasonable 1/8" or so.... The cocking force the way the gun is tuned now is less than 8 lbs.... MAN, do these ART/SS valve ever work to reduce that, I'm VERY impressed, and happy with my first effort building one.... and only 2 failures along the way.... :roll:

Bob

_________________
Dominion Marksman Silver Shield - 5890 x 6000 in 1976, and downhill ever since!
Airsonal; Too many! Springers, Pumpers, CO2, but I love my PCPs and developing them!
Proud Member of the 2000+fps Club!


Top
 Profile  
 
PostPosted: Fri Mar 02, 2018 5:17 pm 
Offline
User avatar

Joined: Sat Nov 03, 2007 4:19 pm
Posts: 9518
Location: Coalmont BC
I had a slight leak, and the reservoir was empty this morning, so while I was filling my Great White this morning I pulled the gun apart and replaced all the O-rings.... Afterwards, I found there was still a slight leak through the valve.... Soapy water on a fingertip pressed to the end of the barrel (with the bolt closed) was met with a steady stream of small bubbles.... I don't know if it is the O-rings in the valve, or the poppet not seating perfectly, but after my tank was filled and I tethered it to my 3850 psi output regulator and fired it a few times the leak is almost gone.... I think with time and use, it may seal up OK.... I sized some of the 82.5 gr. bullets to 0.257", set the SSG gap to 1 turn and fired the first shot at this pressure.... 1010 fps for 187 FPE !!!

I followed the same procedure as yesterday with the 6 mm, gradually increasing the SSG gap until the valve quit opening, and recording the velocity at each setting.... Since the regulator was topping up the reservoir after each shot, I was unable to record the pressure drop to figure out the efficiency.... However, I did establish the tuning curve for the .257 when tethered at 3850 psi....

Image

As you can see, with less than 5 turns of gap, the gun is operating on the plateau, just above 1000 fps.... The usable part of the knee is from 7-11 turns of SSG gap.... Surprisingly, the sweet spot was at 9 turns of gap, exactly the same as the 6 mm at 2800 psi.... I would have thought that the hammer strike required would have increased a lot with the 1000 psi increase in pressure (certainly in a conventional valve that is the case).... but it didn't, so one more thing I have learned about (my version) of the SS valve.... I then set the gap back to just 1 turn, to put the gun back to maximum power, and tried all the different bullet weights I have in .257 cal.... Here are those results at 3850 psi....

Image

It was driving the 66 gr. 257420 HPs nearly at Mach 1 (VERY loud), and the 73 gr. 257420 solids at 1060 fps (182 FPE).... Bullets in the most likely weight range for this gun (82-93 gr.) were shooting 970-1010 fps (186-196 FPE), and the heaviest BBT I have, the 113 gr. FN, was able to reach 895 fps (201 FPE), with the 100 gr. BBT hitting 952 fps (201.3 FPE).... Drop about 4% off those velocities to allow for tuning down to where the efficiency is acceptable.... and I have a .257 shooting at 170-180 FPE.... This is about 20 FPE less than my Monocoque, which has a 5" longer barrel, at the same pressure.... My .257 Hayabusa, running the same barrel length but at only 3000 psi, peaked at 160 FPE and was tuned to shoot at 130-135 FPE.... If I want to tune this gun down to use the 257420s (FN or HP) all I need to do is regulate it to a lower pressure.... At the other end, I can drive my heaviest two BBTs fast enough to find out how they work in the 10" twist of this barrel.... so this gun will eventually prove invaluable for bullet testing.... exactly what I wanted.... With a MSWP of 4200 psi, I will be able to shoot the 113 gr. BBTs in the mid 900s....

I did one other test today.... After filling with the regulator to 3850 psi, I disconnected it from the tether and shot 3 shots, allowing the pressure to drop, just to see what happened.... I was back to using the 82.5 gr. bullets, and I had the SSG gap set back to 9 turns.... The velocities ran 952, 953, and 940 fps, averaging 165 FPE.... According to the small gauge on the side of the reservoir, the pressure dropped about 400 psi, which would indicate an efficiency of about 1.0 FPE/CI.... not a very accurate determination.... but shows me I am in the ballpark at that power....

Bob

_________________
Dominion Marksman Silver Shield - 5890 x 6000 in 1976, and downhill ever since!
Airsonal; Too many! Springers, Pumpers, CO2, but I love my PCPs and developing them!
Proud Member of the 2000+fps Club!


Top
 Profile  
 
PostPosted: Sat Mar 03, 2018 3:03 pm 
Offline

Joined: Wed Jan 05, 2011 12:35 pm
Posts: 11353
Location: P.G. B.C.
Amazing stuff, Bob - didn't understand most of it, but holy crap - amazing stuff. Well done. :!:

_________________
Best Wishes
Daryl


Top
 Profile  
 
PostPosted: Sat Mar 03, 2018 4:50 pm 
Offline
User avatar

Joined: Wed Oct 17, 2007 3:27 am
Posts: 2767
Location: Winnipeg, Canada
Very interesting stuff Bob. I am really impressed with the valve construction.

Still haven't read every thing, but very impressive numbers for starting.

I am not really a fan of aluminum on guns~ not since the scope mount screw holes stripped out on my 10-22.
To each his own, I suppose...

After looking at the numbers I gotta ask what the end use is going to be for this build. There's going to be some pretty "interesting" trajectories and related ranging ahead... and that is not a put-down. Genuinely curious...

-D.S.

_________________
"Ain't no half-way"
-S.R.V.


Top
 Profile  
 
PostPosted: Sat Mar 03, 2018 7:57 pm 
Offline
User avatar

Joined: Sat Nov 03, 2007 4:19 pm
Posts: 9518
Location: Coalmont BC
I spent the day today working on the forestock and BiPod mount for the unregulated gun.... The stock is a 10" long piece of 1-1/4" ABS plastic pipe.... It fits loosely over the main tube, and at the back fits under a notch in the receiver designed to clamp it in place against the top of the tube.... That leaves a gap at the bottom of just under 1/8".... At the front there is a curved, taperered shim inside the bottom of the tube, made from a piece of aluminum barstock.... It was quite complicated to machine, because the inside fits the 1.25" OD of the reservoir, and the outside fits the 1.36" ID of the plastic pipe.... and of course the two radii are offset.... I started with a short piece of 1.5"D bar stock, drilled a 1.25" hole 0.055" off center, then chucked it in the lathe and turned the outside down to fit inside the plastic pipe.... I ended up cutting over half the circle away, leaving a crescent shaped piece less than 1.25" wide by 1" long.... I took a short piece of Picatinny rail, milled a concave in the bottom to fit over the outside of the plastic pipe, then drilled and countersunk two holes in it for a pair of 6-32 SHCSs.... These went through two holes in the plastic pipe and were tapped into matching holes in the crescent, so the whole thing went together like a sandwich, with the plastic pipe the filling.... I had made the crescent just a bit too tight a fit, so a drum sander relieved it enough so that the complete forestock would slide over the main tube and back to fit into the notch in the front of the receiver.... Two setscrews tapped through the plastic pipe and crescent, one either side of the Picatinny rail, secure it against the reservoir, pulling it down tight against it, just like the receiver does at the rear.... It looks nice, and feel right, and is very solidly mounted.... I then attached the BiPod to the Picatinny rail, and mounted the scope my wife gave me for Christmas.... This is what the finished rifle looks like, complete with the Harmonic Tuner as well....

Image

The scope is a BSA 4-14 x 44 Side Focus FFP on medium height Hawke mounts.... The gun as shown s 44.5" long, and weighs 9 lbs. 5 oz. and without the BiPod it is 8 lbs. 14 oz.... Without the Tuner, it would be 8 lbs. 6 oz.... and the bare rifle, as I said before, only 6 lbs. 9 oz....

Doc, the plan is for long range target and Varmint shooting.... I hope to get both guns shooting sub-MOA at 100 yards, eventually, and then work out from there to whatever.... My problem is that until we close the Motel in 3 more years my summers are spent at the reception desk instead of out shooting.... The .257 will also be used for extensive bullet testing, at least that is the plan....

Bob

_________________
Dominion Marksman Silver Shield - 5890 x 6000 in 1976, and downhill ever since!
Airsonal; Too many! Springers, Pumpers, CO2, but I love my PCPs and developing them!
Proud Member of the 2000+fps Club!


Top
 Profile  
 
PostPosted: Sat Mar 03, 2018 9:51 pm 
Offline
User avatar

Joined: Mon Feb 11, 2013 12:46 am
Posts: 5707
pretty cool looking Bob well done ... 8)

_________________
"A candle loses nothing by lighting another candle"

Image


Top
 Profile  
 
PostPosted: Sat Mar 03, 2018 10:57 pm 
Offline
User avatar

Joined: Sat Nov 05, 2016 10:52 am
Posts: 3967
Location: Caronport, Saskatchewan
Great work! Looks great and awesome power! We'll, three years seems forever, but hopefully you'll find some more great projects to keep you busy til then. Wishing you a very deserved and enjoyable retirement when it finally comes!

Sent from my LG-H812 using Tapatalk

_________________
Website: https://airgunarcheryfun.ca/


Top
 Profile  
 
PostPosted: Thu Mar 08, 2018 6:05 pm 
Offline
User avatar

Joined: Sat Nov 03, 2007 4:19 pm
Posts: 9518
Location: Coalmont BC
I got the 18 mm x 1.5 mm regulator from Travis yesterday, and made a "tiny" tank from a piece of 1-1/8 steel roundbar 3" long, drilled 2" deep and tapped to match the regulator threads.... I already have one for 5/8"-18 NF threads, but this is the first time I needed one for a reg. with the larger threads.... I tested it the way it came, and it was set for 1,800 psi, and fitted with a 3K burst disc on the output side.... so I replaced the disc with a 5K because I need to be able to increase the pressure to as much as 3,200 psi, which is the MSWP for the tube on my regulated 6 mm.... From initial testing I wanted to try 2,800 psi, so I pulled the reg. apart and found some very strange looking Bellevilles.... Intead of a simple concave/convex shape, they were stamped with a ridge in them, halfway between the inside and outside edges.... Travis had sent me some standard 0.032" Bellevilles, which I am much more familiar with, so I decided to use those.... A series stack of the 0.032" thick would not allow me to get a high enough setpoint, and I would normally use the 0.047" ones for this pressure, but decided that since I had enough I would try a series/parallel arrangement using nested pairs of the 0.032" Bellevilles.... The data I had said that arrangement would be not quite as stiff as a single 0.047", which meant it should be easier to adjust.... I tried 6 pairs and got an output pressure of just 47 psi :shock: so I added another pair, a total or 14 of the 0.032" Bellevilles, arranged like this....

)) (( )) (( )) (( ))

The reg. body is on the left, and the large end of the piston is on the right.... This arrangement gave me about 2400 psi, and I tried a 0.020" shim and that jumped to 3300.... I ended up with 0.012" of shims and got a nice solid, stable 2800 psi, within about +- 10 psi each time I burped it.... and it returned to the setpoint pressure within a few seconds.... Although the base regulator is Chinese, it has a Delrin ball running on the seat, like the Ninja regs. do.... and seems very stable.... I guess I'll find out if it remains that way in the long term, but I have a good feeling about this combination.... I fitted it to my 500 cc 4500 psi CF bottle, measured up the length I needed to clear the trigger group, cut the tube to length, and set it up in my milling attachment in my lathe to drill the mounting holes for the tank block....

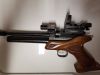
When I made the tank block, I put the holes at a 45 deg. angle to vertical/horizontal, so that I could remove it without pulling the barrel.... This made the setup to drill the holes so that the tank lined up with the trigger group a real PITA.... I ended up using a 5/16" steel rod through the valve screw holes, and a long level with a 45 deg. bubble, and checked and double-checked as I twisted the tube in the milling vice.... I positioned the milling attachment vice in the horizontal and vertical to drill the hole in the middle of the tube, and the correct distance from the end, and with much trepidation, drilled the first hole.... I deburred it while still in place, slid in the tank block and threaded in one screw, and the alignment looked good, so I drilled straight through the tube, and now had two holes.... I loosened the vice, turned the tube 90 deg., inserted the steel rod through them, and used a machinists square on the bed of the lathe to set the tube perfectly, and then checked the distance from the end, and drill the other two holes.... After deburring, all four screws went in with my fingers, and here is the result....

Image

The next thing I have to do is build another set of "guts" for my version of the ART/SS valve.... Based on the results of the first one, I have more confidence in my ability to make a second one that will hopefully work "fresh off the lathe" compared to the long learning process I had the first time around.... Once the second valve is complete, I will be able to assemble the pressure tube and see if it holds air.... The tank / regulator assembly is currently sitting with 1500 psi in it and seems to be holding perfectly.... The plenum is exactly 11" long inside, which makes the volume including the valve 165 cc....

Bob

_________________
Dominion Marksman Silver Shield - 5890 x 6000 in 1976, and downhill ever since!
Airsonal; Too many! Springers, Pumpers, CO2, but I love my PCPs and developing them!
Proud Member of the 2000+fps Club!


Top
 Profile  
 
PostPosted: Thu Mar 08, 2018 6:40 pm 
Offline

Joined: Wed Jan 05, 2011 12:35 pm
Posts: 11353
Location: P.G. B.C.
What rifling twist are you using in the .257, Bob? Those 85 to 90gr. bullets look great!

_________________
Best Wishes
Daryl


Top
 Profile  
 
PostPosted: Thu Mar 08, 2018 6:50 pm 
Offline
User avatar

Joined: Sat Nov 03, 2007 4:19 pm
Posts: 9518
Location: Coalmont BC
Both barrels are a 10" twist.... I know Doug Noble uses a 14" even on his 91 gr., but I wanted to try the faster twist, partly to see how it does with my 100 & 112 gr. BBTs.... which are supposed to need an 8" and 7" twist respectively....

Bob

_________________
Dominion Marksman Silver Shield - 5890 x 6000 in 1976, and downhill ever since!
Airsonal; Too many! Springers, Pumpers, CO2, but I love my PCPs and developing them!
Proud Member of the 2000+fps Club!


Top
 Profile  
 
PostPosted: Sat Mar 10, 2018 4:40 pm 
Offline
User avatar

Joined: Sat Nov 03, 2007 4:19 pm
Posts: 9518
Location: Coalmont BC
I spent yesterday making the "guts" for my SS valve.... I already had the body done, but this is a fiddly job, requiring accurate turning of the plastic poppet, including the O-ring grooves, spring seat and sealing face, plus drilling for the stem and vent.... and then making the matching thimble that it rides in from steel, and mounting it to the perforated wheel in the front of the valve.... In case you are wondering why I am not showing photographs of these parts, it is out of respect for Travis, who is applying for a patent on the design.... Anyways, I got it assembled last night, and had a slow leak out the exhaust port, which I cured today by taking another skim off the poppet sealing face and re-lapping it to the valve body.... After assembly with the 6mm upper, and a few test shots, it is now sitting for a leak-down test until tomorrow.... I used my "tiny" regulator test tank instead of the 500 cc CF bottle, so that I can drain the gun if it needs work without wasting all that HPA.... Once the gun is fully sorted, then I will simply unscrew the small steel "cylinder" from the regulator and spin the CF tank on in its place.... Here is what it looks like at the moment....

Image

My digital gauge is on the inlet, just so I can keep check on the pressure.... I will tether the gun to my Great White for testing by connecting to the male Foster on the inlet of the gauge.... The regulator is set for 2800 psi, and this gun has not been tested before, previous testing was done on the 300 cc unregulated gun, whereas the plenum on this gun is just over half the size, at 165 cc including the valve volume.... I backed out the SSG gap until I saw a slight decrease in velocity, I would have gone further, but I don't have enough travel with the 11 lb/in spring, I will have to fit a weaker one.... I like to tune so that the velocity is 3-5% below the plateau to have decent efficiency.... I did find the plateau velocity with the three bullet weights I have, as follows....

61.3 gr. Bowman (257420 copy).... 993 fps (134 FPE)
63.8 gr. NOE 245-64 FN.... 971 fps (134 FPE)
73.4 gr. NOE 245-74 FN.... 913 fps (136 FPE)

I also have HP versions of all three, about 3 gr. lighter, which I did not test.... I am pleased that the velocity is very close to the same (within about 1%) with the smaller plenum, although it is over 1.2 cc per FPE so I did not expect a dramatic power loss.... It should be large enough to work fine on the .257 cal. upper as well, should I wish to shoot it on the regulated lower....

Now to get a weaker hammer spring so that I can tune this beast down a bit.... ::) 8)

Bob

_________________
Dominion Marksman Silver Shield - 5890 x 6000 in 1976, and downhill ever since!
Airsonal; Too many! Springers, Pumpers, CO2, but I love my PCPs and developing them!
Proud Member of the 2000+fps Club!


Top
 Profile  
 
PostPosted: Fri Mar 16, 2018 5:03 pm 
Offline
User avatar

Joined: Sat Nov 03, 2007 4:19 pm
Posts: 9518
Location: Coalmont BC
Catch-up post on progress.... These occurred over the last week or so....

I have run into an interesting little hiccup with the regulated gun.... The new valve I made is as identical as I could to the old one.... It functions fine, and reaches the same plateau velocity at the same pressure, minus a few fps for the 165 cc plenum instead of the 300 cc reservoir.... However, it takes MUCH less hammer strike to reach the plateau, and it appears to have very little velocity adjustment range before hitting the cliff.... I am not 100% sure about the latter, because I cannot reduce the hammer strike to the point where the velocity drops much, and then one more turn (but right at the edge of my adjustment) it quits opening....

The only thing I noticed on disassembly is that the shiny mark on the poppet that should indicate where it is sealing is near the throat (5/16") instead of near the outer edge of the poppet (3/8"), where it was on the original valve.... Both surfaces were turned at 90 deg. to the axis of the valve, and have been lapped in.... The big end of the poppet is 3/8", the small end is 1/4".... with a 1/32" bleed hole to the exhaust port and a 1/16" "jet" in the front.... I know that the area of the seal on the poppet can affect how easy it opens, so I think that is what I am seeing.... If so, cutting a thou or two of concavity in the poppet to force the seal to the outside edge should cure that...

I am still trying to wrap my head around why these valve require so little hammer strike.... There must be something going on after the poppet cracks off the seat, driving the valve open.... Since I am running effectively no jet (a 1/16" hole in the front) the only thing I can see causing the valve to "blow open" is the delay that the 1/32" vent through the poppet, from the exhaust port to the inner chamber, causes in the pressure in that chamber rising to HPA pressure.... Once that chamber reaches HPA pressure, the only closing force left is the stem diameter times the pressure, which we expect.... but if the chamber pressure lags the exhaust port pressure, during that lag time there is an opening force on the poppet....

I really have to restrict myself to one change at a time.... :roll:

I took the valve apart today and drilled the vent in the poppet out to 0.040" (from 0.032") and undercut the seat on the poppet to move the sealing edge back out to the outside edge, like on the other valve.... Well, the gun is back to requiring the same SSG gap with the lightest bullets as before, instead of less hammer strike when the seal was further in, on the edge of the throat.... and I attribute that to moving the seat out to where it should be.... However, as I increase the bullet weight I seem to have lost velocity, and more hammer strike is required to hit the plateau.... I didn't do a lot of testing, because the valve is leaking slowly out through the barrel, which I think is the seat leaking again.... I'm not 100% sure, but I think the larger vent hole through the poppet, which in theory should not blow open the valve (as quickly) because the pressure inside the balance chamber should be rising quicker.... is doing that with the heavier bullets, but little change with the lightest one....

The more I work on this valve, the more confused I become.... :(

Bob

_________________
Dominion Marksman Silver Shield - 5890 x 6000 in 1976, and downhill ever since!
Airsonal; Too many! Springers, Pumpers, CO2, but I love my PCPs and developing them!
Proud Member of the 2000+fps Club!


Top
 Profile  
 
PostPosted: Fri Mar 16, 2018 5:27 pm 
Offline
User avatar

Joined: Sat Nov 05, 2016 10:52 am
Posts: 3967
Location: Caronport, Saskatchewan
Interesting how very small differences can make such a difference. Good thing you made two or you might have never known how mysterious it could be, lol[emoji846]

Sent from my LG-H812 using Tapatalk

_________________
Website: https://airgunarcheryfun.ca/


Top
 Profile  
 
PostPosted: Fri Mar 16, 2018 5:35 pm 
Offline
User avatar

Joined: Sat Nov 03, 2007 4:19 pm
Posts: 9518
Location: Coalmont BC
OK, today I actually made some progress instead of going backwards.... I think.... ;D

I pulled the valve out of the regulated gun yet again, and drilled the vent hole in the poppet out to 3/64" (0.047").... This is now 50% larger than I started with, which means the area is 2.25 times as large.... The idea is to get the balance chamber to fill from the exhaust port the instant the poppet cracks off the seat, hopefully before the pellet even starts to move down the barrel.... This should prevent (or at least reduce) the valve's tendency to "blow open" the instant it is cracked, which I am pretty sure is the reason for the "cliff" on this and the Cothran valve.... While the Cothran has virtually no velocity adjustment between the plateau and falling over the cliff, the ART/SS valve has a pretty fair velocity adjustment range where you can reduce the velocity, and improve the efficiency, before the valve stops cycling properly, and the velocity plummets over the cliff....

The first tests with this valve (compared to the first valve I made which is in the unregulated gun) had a narrow adjustment range, and required even less hammer strike than the first valve, in fact so light I could barely back the hammer strike down to find the cliff.... I took it apart and drilled the vent hole out to 0.040" and made a slight concave in the poppet seat to move the seal back out to the outside edge, and got back to where the first valve was, with a bit more hammer strike required (the larger vent), and a similar adjustment range between the plateau and cliff.... but the valve was leaking and had to come apart again.... I drilled the vent out even bigger, to 0.047", and it looks like I fixed the leak.... The result is that it took more hammer strike to get the same velocity, although still wayyyyyyyyyyy less than a conventional valve with a 5/16" throat at 2800 psi would require.... What I also got, just as I had hoped for, was a MUCH larger adjustment range between the velocity and where the valve stopped functioning.... In fact the cliff has basically disappeared.... 8) .... I can adjust the velocity down to under 500 fps by just increasing the SSG gap, something I have NEVER seen before with my version of the ART/SS valve....

All is not perfect, however, because as you increase the hammer strike, and the velocity approaches the plateau, I go through a period of severe hammer bounce.... not a machine-gun but a real BUURRPPP.... and then as the SSG gap gets very small the hammer bounce disappears, probably because the valve is open until the bullet leaves the muzzle (gun is really loud and kicks) which is dropping the pressure in the exhaust port and not slamming the valve closed as hard.... I had been running no preload on the spring on the SSG, which isn't great for resisting hammer bounce, so I added 2 lbs. of preload, and then 4 lbs., and the period of hammer bounce got less each time, but of course I had to increase the SSG gap to get off the plateau and back to the adjustable portion of the curve.... Instead of running about 9 turns of gap (with no preload), I am running about 12 turns (with 4 lbs. preload).... However, I am delighted with the wide velocity adjustment range, so I think I'm on the right track, and the gun is still VERY easy to cock....

One of the cures for hammer bounce is a light hammer, of course, and it works well on a gun where you have lots of hammer strike available (without excess cocking force).... In a gun with an SSG, it generally reduces the gap because of the drastic reduction in hammer momentum, which allows more lift and less dwell.... The plan is to make a MUCH lighter hammer, I think I will try one with no metal core at all, just straight MDS.... May as well start there and back up if I have to.... :roll:

Bob

_________________
Dominion Marksman Silver Shield - 5890 x 6000 in 1976, and downhill ever since!
Airsonal; Too many! Springers, Pumpers, CO2, but I love my PCPs and developing them!
Proud Member of the 2000+fps Club!


Top
 Profile  
 
Display posts from previous:  Sort by  
Post new topic Reply to topic  [ 95 posts ]  Go to page Previous  1, 2, 3, 4, 5, 6, 7  Next

All times are UTC - 5 hours


Who is online

Users browsing this forum: No registered users and 4 guests


You cannot post new topics in this forum
You cannot reply to topics in this forum
You cannot edit your posts in this forum
You cannot delete your posts in this forum
You cannot post attachments in this forum

Search for:
Jump to:  
News News Site map Site map SitemapIndex SitemapIndex RSS Feed RSS Feed Channel list Channel list

Powered by phpBB © 2000, 2002, 2005, 2007 phpBB Group

phpBB SEO