Canadian Airgun Forum

The #1 Community for Airguns in Canada!
It is currently Thu Apr 18, 2024 6:57 pm

All times are UTC - 5 hours


The Canadian Airgun Forums are a place for people to discuss and learn about airguns and the airgunning sport in Canada. There are lots of discussions about airguns, airgun accessories, reviews, modification and repair information, airgun events, field target and free classifieds!


You need to register before you can post: click the register link to proceed. Before you register, please read the forum rules. By joining our free community you will have access to post topics, communicate privately with other members (PM), respond to polls, upload your own pictures, and access many other special features. Registration is fast, simple, and absolutely free! To start viewing messages, select the forum that you want to visit from the selection below.


Post new topic Reply to topic  [ 76 posts ]  Go to page Previous  1, 2, 3, 4, 5, 6  Next
Author Message
PostPosted: Fri Jan 05, 2018 11:11 am 
Offline
User avatar

Joined: Sat Nov 03, 2007 4:19 pm
Posts: 9518
Location: Coalmont BC
When you crank it up to 58 FPE from the 21" barrel it's pretty loud.... :roll:

Not so bad when tuned for a 12-shot string at 43 FPE.... particularly for the first half of the string.... but gets pretty noisy for the last few shots.... and with the hammer bounce then, it does kind of "B-AA-RRR-KKKK".... :mrgreen:

Bob

_________________
Dominion Marksman Silver Shield - 5890 x 6000 in 1976, and downhill ever since!
Airsonal; Too many! Springers, Pumpers, CO2, but I love my PCPs and developing them!
Proud Member of the 2000+fps Club!


Top
 Profile  
 
PostPosted: Fri Jan 05, 2018 7:23 pm 
Offline
User avatar

Joined: Sat Nov 03, 2007 4:19 pm
Posts: 9518
Location: Coalmont BC
If you have been following this thread from the beginning, you may remember that the trigger when I first inspected it had a burr on the top of the sear.... I polished it out, and when I pulled the gun down to do some work on it today, the burr is back, and bigger than before.... I had noticed that the back bottom edge of the hammer had the corner ground off (by hand) as if to cure some issue.... Well, I just discovered what that issue is, and IMO Beeman have made a really sloppy attempt to "cure" what over time may become a serious issue.... Here are what the parts look like today....

Image

You can see the damage on the top of the sear, it appears to have been impacted from the "top".... Well that something is the back corner of the hammer, right where they ground a bevel on it.... In the photo, on the back of the Chief hammer, you can actually see a matching shiny mark on the hammer, right where it passes over the sear.... When the gun fires, the sear rotates forward into a near horizontal position, with the point on the top of the sear facing forward, towards the valve.... When the hammer bounces, and is thrown back towards the sear by the closing valve, that ground off back corner is colliding with the sear, and doing it hard enough to roll over the edge and form a burr, actually both front and back but worse on the back (what you can see in the photo), right where it holds the cocked hammer.... So I went in search of a solution.... I happen to have hammers from a QB78D and an FD-PCP, both of which use the same QB trigger assembly.... Here are the three hammers, with the sear catch points all lined up.... You are looking at the bottom of the hammers.... Forward (the valve side) is to the left, and the rear (spring side) is to the right.... The ground off corner on the back bottom corner of the Chief hammer is plainly visible....

Image

Note that on the left (front) all three hammers have a flat ground on them, which is to clear the front trigger mounting screw.... On the Chief, it is a milled channel.... On the back the FD-PCP hammer has the lower part of the OD machined completely away, nothing to hit the sear after the gun is fired.... On the QB hammer, there IS no large OD behind the ring the sear catches on.... This should mean that all I have to do is mill a flat on the back of the Chief hammer, to prevent it from hitting the sear when fired.... I'll let you know how it works....

Bob

_________________
Dominion Marksman Silver Shield - 5890 x 6000 in 1976, and downhill ever since!
Airsonal; Too many! Springers, Pumpers, CO2, but I love my PCPs and developing them!
Proud Member of the 2000+fps Club!


Top
 Profile  
 
PostPosted: Fri Jan 05, 2018 10:26 pm 
Offline
User avatar

Joined: Sat Nov 03, 2007 4:19 pm
Posts: 9518
Location: Coalmont BC
Well, when I tried to mill a slot in the bottom I quickly found out that the hammer is hardened, and ruined an end mill trying.... So, I had to use my bench grinder and just grind a flat on the bottom as in this photo....

Image

When I reassembled the gun, the cocking was somewhat "gritty" just before the hammer engaged the sear, so I guess the hammer is cocking slightly in the tube because I removed metal right where the hammer is pressing on the tube from the location of the cocking pin on top.... I deburred both the sear slot and the cocking slot in the tube (should have done that anyways).... and I used a stone in a Dremel and rounded the sloped surface in front of the new flat, and smoothed it so that it can't dig in.... It now cocks as smoothly as before.... but a better solution would be a hammer with a narrower flat, more like the one in front of the sear notch, so that more of the circumference of the hammer would bear on the tube.... only removing material from the bottom center to prevent damage to the sear.... I repolished the sear to remove the burr, so I can tell in future if there is any problem remaining.... but if I properly diagnosed the problem there really can't be.... I hope.... ::)

I tested the gun and the velocities are almost identical to before, it will still hit the same 966 fps maximum at 2000 psi with the 25.4 gr. at maximum preload.... and it now takes about 5.5 turns out of preload to get my best bell-curve, instead of 6 turns out.... the extra bit of preload made necessary by the slightly lighter hammer, I would think.... However, the gun seems louder, and may have increased hammer bounce.... I suspect that the back of the original hammer (where Beeman rough ground that corner) was hitting the trigger sear hard enough to debounce the hammer somewhat.... So, in saving the sear from further damage, I'm pretty sure I have increased the air consumption....

I was planning on making an SSG for this gun anyways.... so this is an excuse to make a new and better (longer) hammer that is less likely to cock in the tube.... and with a hole through it for the spring instead of that guide pin.... I have a 10 mm x 1mm bolt that I can use for the gap adjuster for the SSG that will thread into the rear plug.... so that will be the next order of business....

Bob

_________________
Dominion Marksman Silver Shield - 5890 x 6000 in 1976, and downhill ever since!
Airsonal; Too many! Springers, Pumpers, CO2, but I love my PCPs and developing them!
Proud Member of the 2000+fps Club!


Top
 Profile  
 
PostPosted: Fri Jan 05, 2018 10:51 pm 
Offline
User avatar

Joined: Sat Nov 05, 2016 10:52 am
Posts: 3967
Location: Caronport, Saskatchewan
Looking forward to your results! That was quite a defect they had there, to make that burr again so quickly, must have been a lot of force on it.

Sent from my SM-G930W8 using Tapatalk

_________________
Website: https://airgunarcheryfun.ca/


Top
 Profile  
 
PostPosted: Sat Jan 06, 2018 12:31 am 
Offline
User avatar

Joined: Sat Nov 03, 2007 4:19 pm
Posts: 9518
Location: Coalmont BC
Yes, I'm not very happy with the "fix" they chose.... I don't know if other Chiefs are the same, in varying degrees, or if I was just unlucky.... but they obviously knew there was a problem and didn't do a very good job of thinking through it.... a definite lack of QC there, for sure....

Bob

_________________
Dominion Marksman Silver Shield - 5890 x 6000 in 1976, and downhill ever since!
Airsonal; Too many! Springers, Pumpers, CO2, but I love my PCPs and developing them!
Proud Member of the 2000+fps Club!


Top
 Profile  
 
PostPosted: Sat Jan 06, 2018 2:13 pm 
Offline
User avatar

Joined: Wed Oct 17, 2007 3:27 am
Posts: 2767
Location: Winnipeg, Canada
I ran into similar problems with the hammer on my custom tube build. I took about .002" off the bottom of the entire length to get it working without binding. That was of course due to the tighter tolerances of the new pcp tube. I used a d/p vise and a m/b file to cut the hardened steel. IIRC, I started the cut with some #120 oxide grit cloth wrapped around a file.... This hardening is no where near as hard as Marlin receivers :mrgreen:

I'm not running that much preload on it- in fact, I had to back off a bit on the preload to get anywhere near a consistent shot string.
The sear on this build took a lot of cleaning up, especially on the contact edges....

I still have a couple of hammers to make up for up coming projects. There's some motor shafts at work I had better grab before they make the scrap metal bin...

-D.S.

_________________
"Ain't no half-way"
-S.R.V.


Top
 Profile  
 
PostPosted: Sat Jan 06, 2018 7:35 pm 
Offline
User avatar

Joined: Sat Nov 03, 2007 4:19 pm
Posts: 9518
Location: Coalmont BC
I made a new hammer today.... I moved the sear catch point forward about 0.070" to increase the hammer stroke to a measured 3/4".... I can't believe how long it took to make this, about 5 hours.... :o

Image

The cocking pin is in the same relationship to the front of the hammer as before.... but of course is stops 0.070" further back in the cocking slot when the hammer is cocked.... There is still plenty of room at the back end of the slots in both tube and receiver to cock the gun, also at the back of the slot for the bolt handle.... but I did run into one of those problems you don't anticipate.... After the hammer is cocked, when you slide the bolt forward, It didn't QUITE go far enough to turn down and lock.... What was happening is that the section in the middle of the bolt that is milled down wasn't quite long enough at the back, so I had to machine that 0.070" further back as well.... Fortunately there was lots of material in front of the threaded hole for the bolt handle, or I would have been making another hammer.... ::)

The hammer looks a LOT different than the original.... First of all, it doesn't have an intergral spring guide at the back, instead it has a 3/8" hole drilled about 1.5" deep through the center from the back.... This removes some weight, and gives a place for the spring and guide when you cock the hammer.... There is a additional full diameter section at the back to keep the hammer straighter in the tube, which should make it cock easier.... The weight at the moment is actually 1 gram less than the original hammer with the flat ground on the bottom, and 4 grams lighter than stock.... The cocking pin is made from a 1/2" long 8-32 SHCS with a 3/16" spacer threaded onto it, and then the "head" turned down to fit inside the cocking slot.... The hammer is counterbored 5/8" diameter from the back 3/16" deep to clear the extension on the rear plug, and the hammer will cock with it in place without having to shorten or modify it.... just in case I want to return the hammer setup to stock....

Tomorrow I hope to have time to figure out and make the SSG.... The plan is to have the guide fixed, with a sliding collar driving the hammer.... I like this style because it doesn't have a moving guide sticking out the back of the tube, and doesn't waste any energy accelerating the guide.... At least, that's the plan....

Bob

_________________
Dominion Marksman Silver Shield - 5890 x 6000 in 1976, and downhill ever since!
Airsonal; Too many! Springers, Pumpers, CO2, but I love my PCPs and developing them!
Proud Member of the 2000+fps Club!


Top
 Profile  
 
PostPosted: Sun Jan 07, 2018 12:39 am 
Offline
User avatar

Joined: Sat Nov 05, 2016 10:52 am
Posts: 3967
Location: Caronport, Saskatchewan
Great work! Amazing to be able to even make something like that period, with your own design, and it'll be great to see how it works for you. Looking forward to pics of the ssg!


Sent from my SM-G930W8 using Tapatalk

_________________
Website: https://airgunarcheryfun.ca/


Top
 Profile  
 
PostPosted: Wed Jan 10, 2018 12:41 am 
Offline
User avatar

Joined: Sat Nov 03, 2007 4:19 pm
Posts: 9518
Location: Coalmont BC
I made the SSG for the Chief yesterday, here is a photo of it....

Image

The 10 mm x 1 mm hex head bolt is the gap adjuster.... It threads into the original rear plug, and I drilled it out and tapped it 10-32 for the spring guide, which will also adjust the preload on the spring by using the screwdriver slot in the outer end.... There is a short steel spacer that is small enough to fit inside the 10mm threads, and then has a small shoulder on it for the spring stop, that fits in the 10.5 mm drilled hole in the end plug, and acts as a stop (in a similar manner to the washer on the outer end of the spring in a stock gun) when it comes up against the threads.... That spacer also has a short spring seat on it that fits nicely inside the spring.... I used the "set" spring from the Chief (12 lb/in), and made a sliding black Delrin spring guide for the other end of the spring.... The "head" on the front end of the spring guide is a 10-32 nut, threaded on with Loctite 638 (green) and then turned down under 3/8" to fit inside the hole I drilled in the hammer.... There is a # 008 O-ring (70D) acting as a bumper between the sliding guide and the end stop, just to cushion it a bit when it comes to a halt....

The black Delrin spring guide is what actually drives the hammer.... It sits in a recess in the back end of the hammer, and when you cock the gun, the hammer and that Delrin guide moves back over the (fixed but adjustable) steel spring guide, which moves into the 3/8" hole in the hammer.... That hole has to be deep enough to allow the hammer to cock fully, throughout the entire range of adjustment.... I ended up drilling it to within 0.10" of the front of the hammer to get clearance when the SSG is adjusted to zero gap, and all preloads from zero to 1/2" (which would be 6 lbs. of preload).... It seemed to take forever to get the right combination of the hole depth in the hammer, the length of the Delrin spring guide, and the steel spacer, plus I had to drill the 10.5 mm hole in the rear plug deeper, before I was satisfied that I had enough adjustment.... Once I find the setting(s) I want to use, I will have way more adjustment than I actually will use, of course.... but the first time on a new gun I always err on more adjustment rather than less....

While I am talking about adjustments, you will remember that I moved the sear notch on the hammer forward 0.070" to increase the hammer travel to a full 3/4".... Boy, was that a mistake.... ::) .... Although I measured the lengths of the cocking slots in the tube and receiver and they were fine, I had to end up making TWO additional changes to the bolt travel to allow me to cock the gun with the new hammer in place.... It turns out that the milled slot in the bolt, which I had to lengthen at the back to allow the bolt to move forward enough to lock.... was too far forward at the front to draw the cocking pin back far enough to cock the hammer.... This is because the cocking pin is 0.070" further back, relative to the sear notch, of course.... The solution was to mill the slot for the bolt handle longer at the back, to allow the bolt to move further and cock the new hammer.... Well, that ALMOST worked, except the rear of the bolt then hit the plug in the back of the receiver, so I had to shorten that as well.... although only about 0.020".... All this occurred because I tried to get an extra 0.070" of hammer stroke.... My guess is that I should have left the cocking pin in the same relationship to the sear notch, and only shortened the front of the hammer to get the increased stroke.... There is one good bit of news, however.... By doing what I did, there is now more room to load the pellet when the bolt is back in the cocked position.... even with the longer probe I made.... So, all turned out well in the end, it was just a lot more work than I intended....

This is a typical case of one mod. requires two more, and those two need a couple more each.... and pretty soon what should have been really simple ends up causing lots of work and stress.... :(

Anyways, I assembled it tonight (for about the umpteenth time) and it looks like I finally have every working OK and tons of adjustment in the SSG.... With 0.40" of preload on the spring, and 1 turn of gap on the SSG (0.040") it shoots 900 fps.... At these settings I have 4.8 lbs. of preload, and the cocking force is just over 13 lbs.... quite acceptable.... I hope tomorrow to play with adjustments and shoot some strings....

Bob

_________________
Dominion Marksman Silver Shield - 5890 x 6000 in 1976, and downhill ever since!
Airsonal; Too many! Springers, Pumpers, CO2, but I love my PCPs and developing them!
Proud Member of the 2000+fps Club!


Top
 Profile  
 
PostPosted: Wed Jan 10, 2018 5:05 pm 
Offline
User avatar

Joined: Sat Nov 03, 2007 4:19 pm
Posts: 9518
Location: Coalmont BC
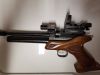
I reassembled the Chief today, here is a photo of it with the SSG installed.... The distance that the threaded rod protrudes past the head of the gap adjusting bolt equals the amount of preload on the spring.... No reason it can't be shortened, now that I know about where it will be running.... but that makes it very easy to measure how much preload on the spring.... in this case 0.40"....

Image

The only other external changes are both ends of the bolt slot are slightly longer/deeper to allow for the longer hammer travel, but those changes require close inspection to even see, and once I touch up the bluing will be invisible.... I set the preload to 0.40", and then tethered the gun at 1800 psi and adjusted the gap from 3 turns negative (actual preload on the hammer) to 7 turns of gap.... Each turn of the gap adjusting bolt is 1 mm, so that is a total range tested of 10 mm (just about 0.40").... Here are the results, with both 18.1 gr. Heavies and 25.4 gr. Monsters....

Image

When I am tuning a PCP with an SSG installed, I try and get the preload to the point that the velocity goes up onto the plateau with just a small amount of preload present, with the heaviest pellets I intend to use.... That way, you are on the knee of the curve with just a very small gap.... You can see that with the 25.4 gr. pellets, the knee of the curve is right at 1 turn of gap (0.040").... Sometimes you can get a bit more efficiency by using a bit more preload and a bit more gap, to give the hammer just a bit more room to rattle around.... but the difference is usually small.... As is typical of a gun with an SSG installed, once you start adding preload the gun gets very loud.... That happened with just 1 turn of preload in from zero gap, as expected.... Also, as you back the gap adjuster out, at some point the gun gets significantly quieter, and that happened at about 4-5 turns out.... By that time the velocity is dropping fast.... and the gap is so large that you may even see differences in velocity shooting uphill or downhill, because the hammer is coasting a long ways, and gravity has longer to act with a big gap.... The gun may be very efficient at those wide gaps, but may also suffer from a large velocity SD.... so you are usually better off to reduce the preload on the spring, and reduce the gap back down to under 1/8" or so....

Once satisfied that I had the preload in the ballpark, I shot a string with the 25.4 gr. Monsters with 2 turns of gap, using a 2000 psi fill.... I repeated with the 18.1 gr. Heavies, but the velocity was over 1000 fps, so I backed the gap adjuster out another turn, and shot a string with the Heavies at 3 turns of gap.... The results are shown below.... Only shots with a 4% ES are shown....

Image

I am very pleased with the shot count at the power levels achieved.... The ending pressure of the strings were 1320 psi for the 25.4 gr. pellets, and 1200 psi for the 18.1 gr. pellets.... so I am getting a useful pressure range of 700-800 psi, compared to the 500 psi of the stock gun.... Part of that is due to the harder PEEK poppet, and part to the lack of hammer bounce on the second half of the shot string from the SSG.... The efficiency isn't too bad at these power levels, and ends up the same with both pellets, at 1.17 FPE/CI.... The 25.4 gr. Monsters returned 11 shots averaging 873 fps (43.0 FPE).... while the 18.1 gr. Heavies gave 14 shots averaging 959 fps (37.0 FPE).... both within my standard 4% ES.... By comparison, my much modified .22 cal Disco, with a 3" longer barrel that the Chief, required a 2400 psi fill to equal that string with the 18.1 gr. pellets, at slightly less efficiency.... so I'm pretty happy with the results....

One other thing I should mention.... With the increased velocity, the groups I am shooting through the Chrony have tightened up further.... The 25.4 gr Monsters now rival the 18.1 gr. Heavies.... and I got some of the new Redesigned Monsters and shot a few of those as well.... They are tighter still, with a hole from 5 shots completely round, but not quite small enough to prevent a pellet from falling through.... Yeah, I know it's only 20 feet.... but when any gun or pellet shoots like that during Chrony testing inside.... I know it has a lot of potential....

Bob

_________________
Dominion Marksman Silver Shield - 5890 x 6000 in 1976, and downhill ever since!
Airsonal; Too many! Springers, Pumpers, CO2, but I love my PCPs and developing them!
Proud Member of the 2000+fps Club!


Top
 Profile  
 
PostPosted: Wed Jan 10, 2018 6:51 pm 
Offline
User avatar

Joined: Sat Nov 05, 2016 10:52 am
Posts: 3967
Location: Caronport, Saskatchewan
Great work Bob! That is great power as well.

Sent from my SM-G930W8 using Tapatalk

_________________
Website: https://airgunarcheryfun.ca/


Top
 Profile  
 
PostPosted: Thu Jan 11, 2018 4:23 pm 
Offline
User avatar

Joined: Sat Nov 03, 2007 4:19 pm
Posts: 9518
Location: Coalmont BC
During testing I was impressed at how stable the velocity of the Chief was, particularly after I installed the SSG, when tethered at 1800 psi.... I decided to decrease the SSG gap by a turn from the previous setting to increase the power, and shoot it both tethered at 1800, and an unreguated string starting from a 2000 psi fill.... Here is the previous chart of the SSG strings with the new one added in black....

Image

Note that the first 5 shots are right at the sweet spot, and over 900 fps.... The total string is only 8 shots long, because the first part of the bell-curve is missing, but I expected that.... The total air use was 600 psi (ending at 1400) for an efficiency of 1.03 FPE/CI, pretty typical for a string that starts near maximum power.... It is an indication of how tight you can get the ES in an unregulated gun if you only use the top of the bell-curve.... The first 5 shots were with a range of just 7 fps (ES less than 0.8%).... I then tethered the Chief to my regulator, set to 1800 psi (pretty much right at the peak of the curve).... I shot 10 shots between 906 - 914 fps, just 4 fps above and below the 910 fps average (46.7 FPE), and a total ES of 8 fps, just 0.9%.... Basically, the gun didn't care if it was regulated at 1800 psi.... or if the pressure was dropping from 2000 psi down to 1600.... This shows excellent consistency in the hammer strike, considering the pellets were straight from the tin, with no sorting by head size or weight....

Scott (Motorhead), who does a lot of work with regulated PCPs, is always telling guys that if they are having problems with the ES on a regulated gun, they should make sure that the regulator setpoint needs to be at the peak of the bell-curve if they were shooting the gun unregulated, and tuned for that peak velocity.... This makes it VERY insensitive to variations in setpoint pressure or regulator creep.... This is a perfect example of how that occurs....

Bob

_________________
Dominion Marksman Silver Shield - 5890 x 6000 in 1976, and downhill ever since!
Airsonal; Too many! Springers, Pumpers, CO2, but I love my PCPs and developing them!
Proud Member of the 2000+fps Club!


Top
 Profile  
 
PostPosted: Mon Jun 04, 2018 4:52 pm 
Offline
User avatar

Joined: Sat Nov 03, 2007 4:19 pm
Posts: 9518
Location: Coalmont BC
I finally got a chance to shoot the Chief today, other than just over the Chrony in my shop.... I checked the accuracy with three pellets at 50 yards, and the clear winner was the new 25.4 gr. Redesigned JSB Monsters.... Here is the group off front and rear bags, tethered at 1800 psi.... you can easily cover it with a dime....

Image

It shot well enough with both the 18.1 gr. Heavies and the old cylindrical 25.4 gr Monsters at 50 yards.... The Heavies were shooting at 950 fps and the Monsters at 820 fps.... I cranked up the velocity on the Redesigned Monsters to 920 fps and the group opened up so that all three were shooting just over 1" at 50 yards.... I tried them at 100 yards, and got a 2.3" group with the 18.1 gr. Heavies at 950, a 2.6" group with the Redesigned Monsters at 920 fps, and about a 4" group for the old Cylindrical Monsters, but only 4 hit the paper.... This is the second gun I have tried the new Redesigned JSB Monsters in, and they shoot FAR better than the old pellets at 100 yards, although there is not a lot of difference at 50....

Since the new Monsters shot a lot tighter at 50 yards at a lower velocity I decided to back off the velocity a bit at 100, and dropped it to about 870 fps, by using the tune with 2 turns of SSG gap as in the chart above (the blue line).... This cut the group size at 100 yards in HALF, with this result.... just 1.3" C-T-C at 100 yards....

Image

This is a 43 FPE tune, and I had the opportunity to shoot a couple of Marmots after my target session, and it really lays the hurt on them.... I took one at 58 yards and it folded like a cheap tent with a 25.4 gr. pellet between the eye and ear.... Overall, I am delighted with the results of this gun.... It is the first gun I have found that shoots better with the new Redesigned 25.4 gr. Monsters than with my standby 18.1 gr. Heavies.... which is nice because they suit the power of this gun just great.... They seem to open up over 900 fps, but in the high 800's they are deadly....

Bob

_________________
Dominion Marksman Silver Shield - 5890 x 6000 in 1976, and downhill ever since!
Airsonal; Too many! Springers, Pumpers, CO2, but I love my PCPs and developing them!
Proud Member of the 2000+fps Club!


Top
 Profile  
 
PostPosted: Mon Jun 04, 2018 10:22 pm 
Offline
User avatar

Joined: Sat Nov 05, 2016 10:52 am
Posts: 3967
Location: Caronport, Saskatchewan
Wow, that's some great shooting, with a lot of hitting power! You've got those QBs shooting like high end guns! =) Great work! The modifications and ssg make this gun worth a pile more!

Sent from my LG-H812 using Tapatalk

_________________
Website: https://airgunarcheryfun.ca/


Top
 Profile  
 
PostPosted: Mon Jun 04, 2018 11:10 pm 
Offline
User avatar

Joined: Sat Nov 03, 2007 4:19 pm
Posts: 9518
Location: Coalmont BC
We shall see.... it's currently for sale, as is the QB with the twin 88 gr. cylinders....

Bob

_________________
Dominion Marksman Silver Shield - 5890 x 6000 in 1976, and downhill ever since!
Airsonal; Too many! Springers, Pumpers, CO2, but I love my PCPs and developing them!
Proud Member of the 2000+fps Club!


Top
 Profile  
 
Display posts from previous:  Sort by  
Post new topic Reply to topic  [ 76 posts ]  Go to page Previous  1, 2, 3, 4, 5, 6  Next

All times are UTC - 5 hours


Who is online

Users browsing this forum: No registered users and 5 guests


You cannot post new topics in this forum
You cannot reply to topics in this forum
You cannot edit your posts in this forum
You cannot delete your posts in this forum
You cannot post attachments in this forum

Search for:
Jump to:  
News News Site map Site map SitemapIndex SitemapIndex RSS Feed RSS Feed Channel list Channel list

Powered by phpBB © 2000, 2002, 2005, 2007 phpBB Group

phpBB SEO