Canadian Airgun Forum

The #1 Community for Airguns in Canada!
It is currently Tue May 14, 2024 12:38 pm

All times are UTC - 5 hours


The Canadian Airgun Forums are a place for people to discuss and learn about airguns and the airgunning sport in Canada. There are lots of discussions about airguns, airgun accessories, reviews, modification and repair information, airgun events, field target and free classifieds!


You need to register before you can post: click the register link to proceed. Before you register, please read the forum rules. By joining our free community you will have access to post topics, communicate privately with other members (PM), respond to polls, upload your own pictures, and access many other special features. Registration is fast, simple, and absolutely free! To start viewing messages, select the forum that you want to visit from the selection below.


Post new topic Reply to topic  [ 17 posts ]  Go to page 1, 2  Next
Author Message
PostPosted: Thu Apr 09, 2015 6:53 pm 
Offline
User avatar

Joined: Mon Feb 11, 2013 12:46 am
Posts: 5722
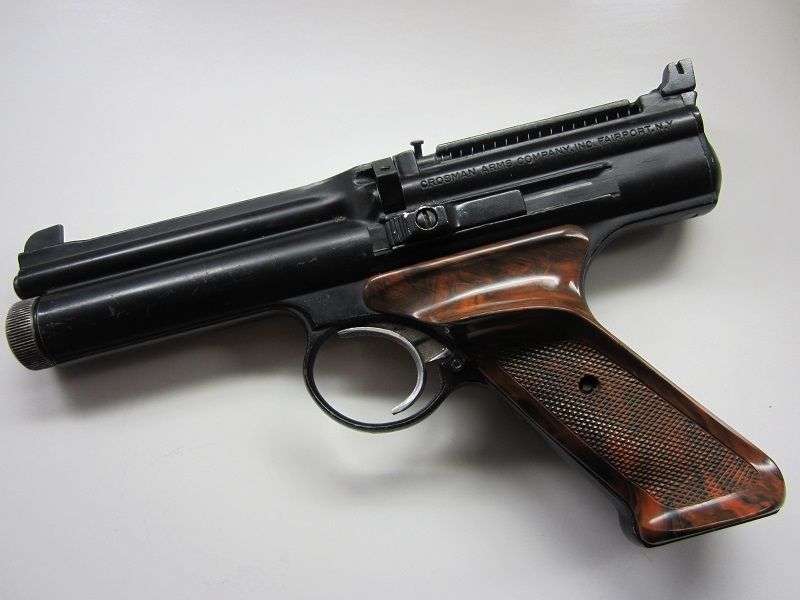
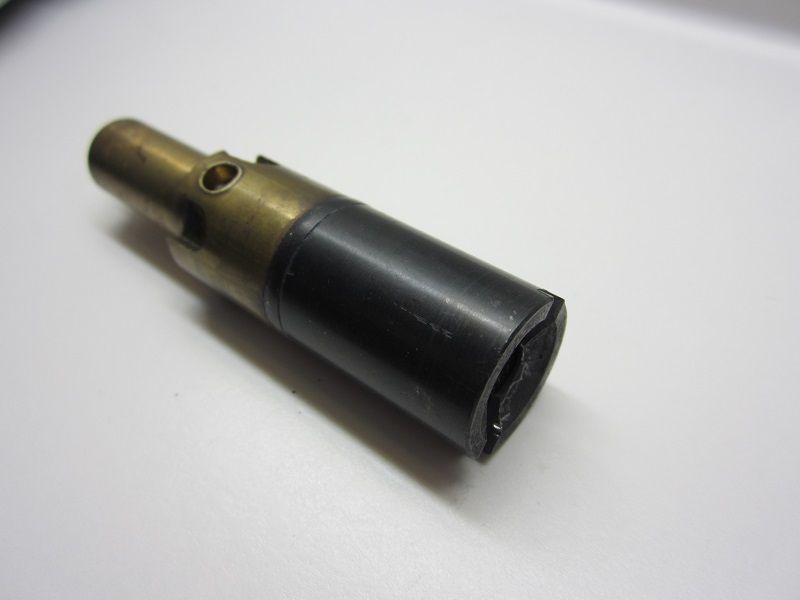
I've fixed quite a few of these, and trust me there have been some bad ones, but this one was a heck of a nightmare....and I knew right from the start that something was odd/weird just by looking at the end cap..... :?
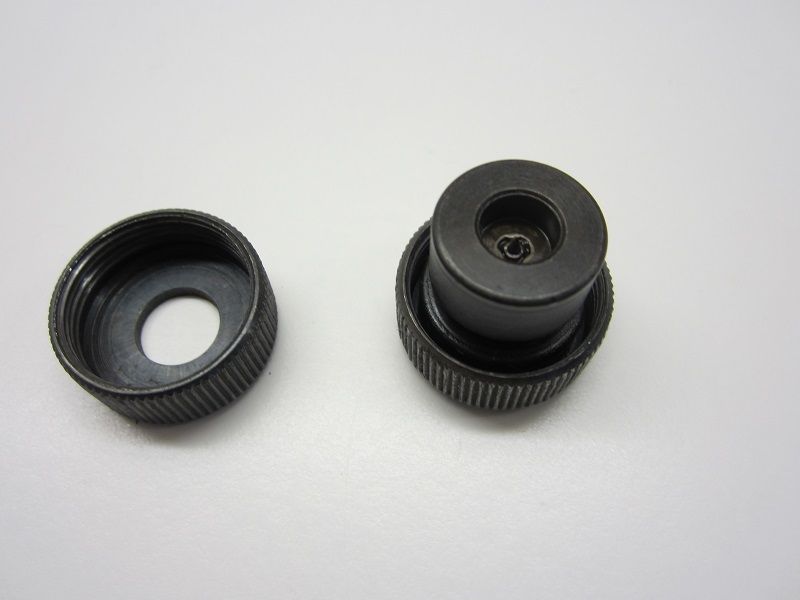
pic's of end cap...a stock looking 600 end cap is on the right

Image
Image

so I start to dissemble the 600 everything is going pretty smooth until I pull the main tube out, there are two small screw type
pins that hold the valve in place from moving, well looks like someone forced them back on and filed them down...so I had to macgyver something to get them out without causing any further damage to this thing :roll:

finally got the pins out now to remove the valve...anyone that's worked on one of these knows the valve has an o-ring that sits between the two halves of the valve that prevent the CO2 from escaping around the valve but also secures the valve from just sliding
out once the pins have been removed....normally you unscrew the front section of the valve, loosening the tension on the o-ring and then slide the valve out the front of the tube...well that's out of the question due to this mod that who knows how many owners before had put this thing in.... :roll: 
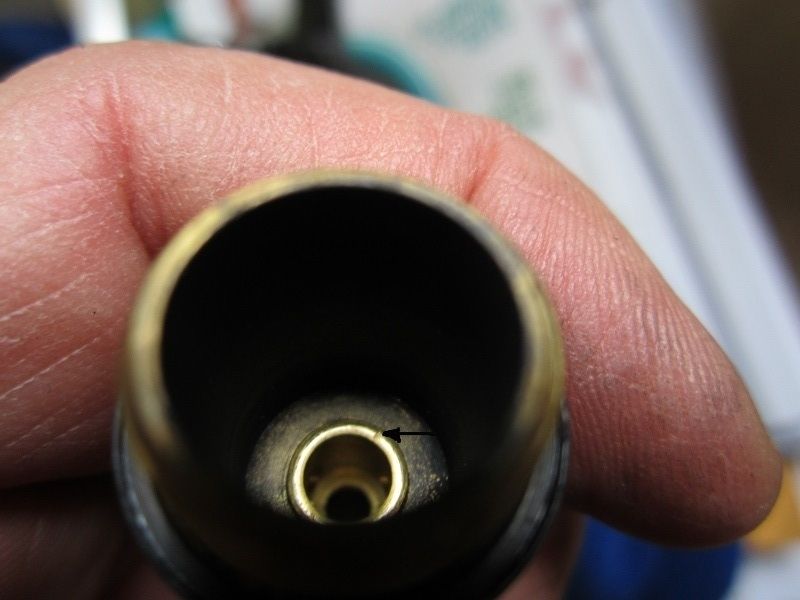
managed to get the valve out (forced out) and found this thing siting in front of the valve don't even know what its called...never seen one like it before, some kind of piercing mechanism :?

Image
Image
Image

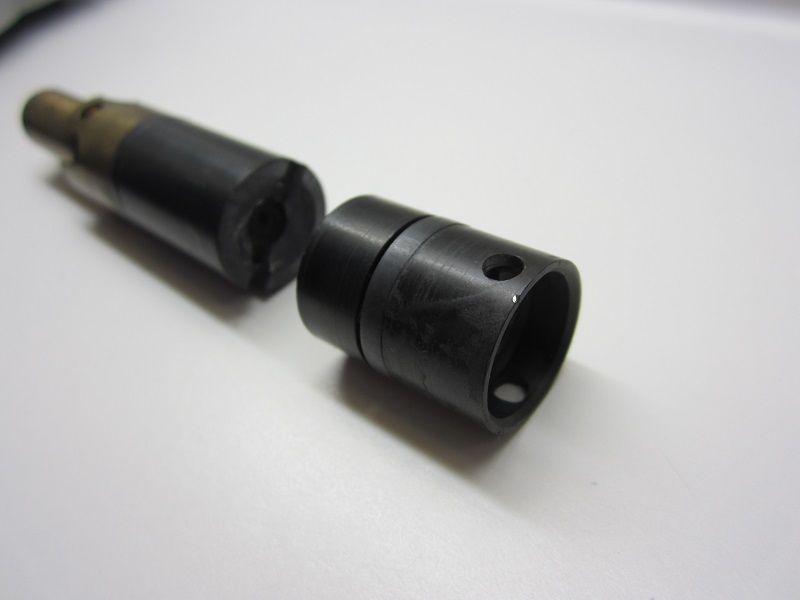
don't know why someone would go through all this trouble to put in this piercing gizmo and not just get an end cap :?
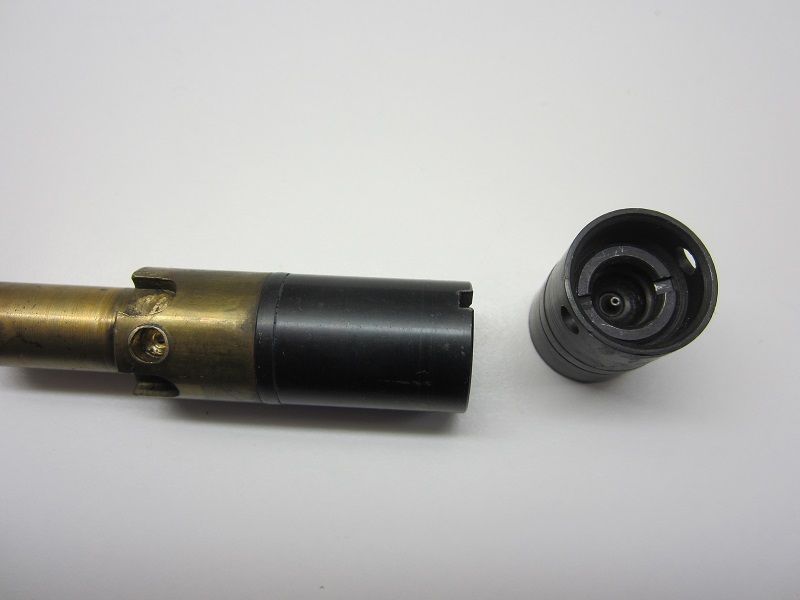
here is the valve by its self looks like an older version the newer style has an aluminum back section as appose to the brass.
you can clearly see the o-ring has gone hard on it and you can see the front section were you would unscrew it to remove it from
the tube easer..

Image

after remove the valve halves to inspect the valve stem seal I noticed the valve seat had a nick on it this will prevent the valve
stem from seating properly and will cause leaking....so I had to polish it flat again...also the valve stem was bent as well, it just keeps getting better :lol:

Image

the hammer has an o-ring on the inside this rides along the back half of the valve assembly it was all pitted and rough this will also cause leaks and will not allow the 600 to self cock...

Image

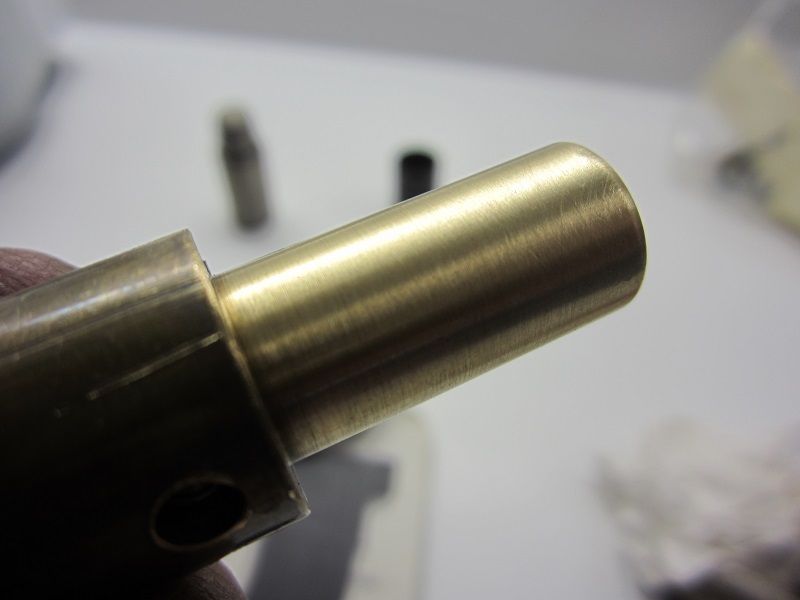
after some polishing, much better surface for an o-ring :wink:

Image

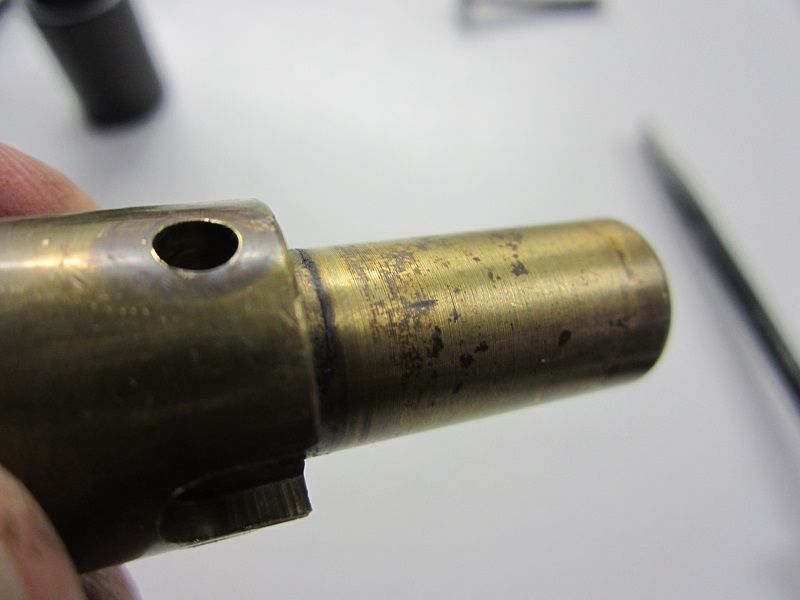
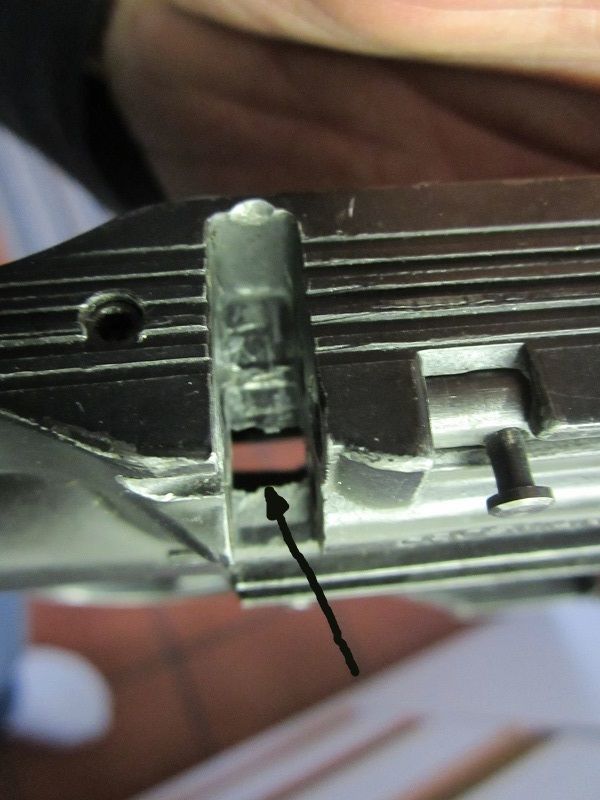
here is the best and most shocking part the breach area was completely worn out to the point that you could see right through it :shock:
this is not a big deal because the tube rides along the inside but I've never see anything worn out like this before....

Image

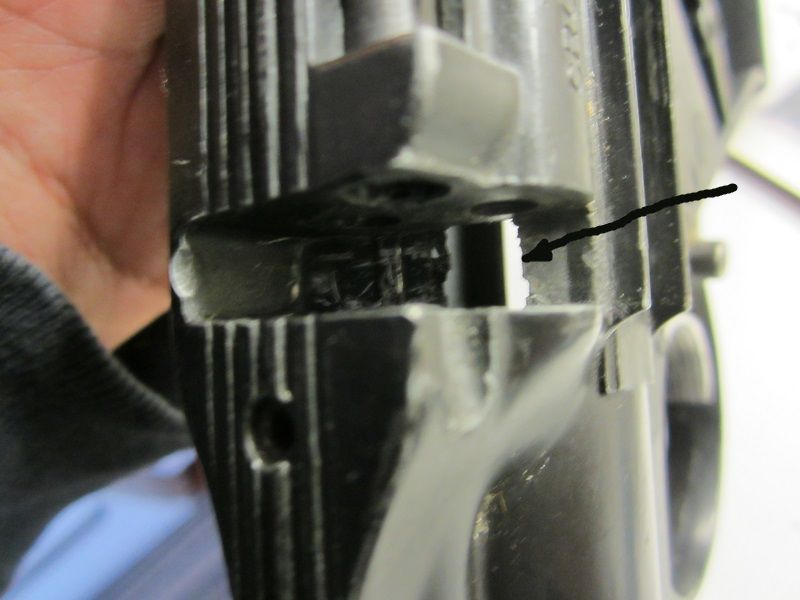
one more....you can see my kitchen tiles through that hole lol... :shock: :lol:
Image

being one to never give up on something, its all back together and working fine like it should be.... :D
Image

_________________
"A candle loses nothing by lighting another candle"

Image


Top
 Profile  
 
PostPosted: Thu Apr 09, 2015 7:48 pm 
Offline

Joined: Wed Feb 17, 2010 6:04 pm
Posts: 841
Location: Nova Scotia
The pits on the back half of the valve assembly look quite deep but you did a good job of polishing. Did you have to cut the pits out on a lathe or just polish with sandpaper?


Top
 Profile  
 
PostPosted: Thu Apr 09, 2015 7:54 pm 
Offline
User avatar

Joined: Fri Sep 23, 2005 2:29 pm
Posts: 6297
Location: Okanagan,BC
Another wonderful job on repairing a fubared 600!

:shock: :D


Top
 Profile  
 
PostPosted: Thu Apr 09, 2015 8:19 pm 
Offline
User avatar

Joined: Mon Feb 11, 2013 12:46 am
Posts: 5722
Watertown wrote:
The pits on the back half of the valve assembly look quite deep but you did a good job of polishing. Did you have to cut the pits out on a lathe or just polish with sandpaper?

just some fine sand paper polishing then followed by some fine pad polishing, haven't got a lathe wish I did, just good old elbow grease :wink:

wllm995 wrote:
Another wonderful job on repairing a fubared 600!

:shock: :D


thanks Doug you should know buddy :wink: :wink:

_________________
"A candle loses nothing by lighting another candle"

Image


Top
 Profile  
 
PostPosted: Thu Apr 09, 2015 9:38 pm 
Offline
User avatar

Joined: Wed Jul 24, 2013 9:13 am
Posts: 4030
Location: Toronto
Thank you Ace from the bottom of my wallet!!!

And you did all that since we spoke earlier today it seems.....wow.

I will report that yes I bought it and yes the seller disclosed some of the issues and that he had just inherited it and had no real idea of its shape. I still believe the price was right and there was no misrepresentation and now Ace has some new tricks under his belt and I get a 600 in "Ace" condition...Thanks Marvin for some parts rescue too.

_________________
Keep you powder dry and your seals oiled.
Shoot straight and safe.

http://plinkercases.ca/


Top
 Profile  
 
PostPosted: Thu Apr 09, 2015 9:43 pm 
Offline
User avatar

Joined: Sun Jan 18, 2015 10:35 pm
Posts: 300
Location: Winnipeg, Manitoba
My 600 has that same type of valve/Peirce assembly. I just need to find a valve stem for mine. Other than that it is good to go, nice job resurrecting that one.

_________________
Be safe and have fun!


Top
 Profile  
 
PostPosted: Fri Apr 10, 2015 5:31 am 
Offline
Supporting Member 2013

Joined: Wed Sep 14, 2005 8:47 pm
Posts: 1689
Location: 123 gun street Nova Scotia
getting the 600 working can be a pain , this one looks extra painfull . i had one with part like this , set up for short 8g co2 i think .


Top
 Profile  
 
PostPosted: Fri Apr 10, 2015 9:14 am 
Offline
User avatar

Joined: Mon Feb 11, 2013 12:46 am
Posts: 5722
DigitalFx33 wrote:
My 600 has that same type of valve/Peirce assembly. I just need to find a valve stem for mine. Other than that it is good to go, nice job resurrecting that one.

thanks DigitalFx33...
really that's interesting.... I've fixed MANY guns and never ran into a piercing assembly like this before now I'm really curious as to why they would come up with this sort of system :?

jezX wrote:
getting the 600 working can be a pain , this one looks extra painfull . i had one with part like this , set up for short 8g co2 i think .

thanks Collin....
yes! I've had quite a few not so good ones to repair as well... but I decides to post this one because it was in extra special condition :lol:
this one took the regular 12gr Co2 cart....that's why the front cap was missing the piercing section.

_________________
"A candle loses nothing by lighting another candle"

Image


Top
 Profile  
 
PostPosted: Fri Apr 10, 2015 10:12 am 
Offline
User avatar

Joined: Sun Jan 18, 2015 10:35 pm
Posts: 300
Location: Winnipeg, Manitoba
The 2 Pc ones like the one shown is the "newer" model the older one the pin is in the cap. In order too flip the co2 they needed to add a spacer. As you can see by comparison the amount the old cap screws into the tube is the same as the "new" spacer. I'm sure it was just easy for crosman to make that change rather than shorten the tube or move or change the valve.

_________________
Be safe and have fun!


Top
 Profile  
 
PostPosted: Fri Apr 10, 2015 12:25 pm 
Offline
User avatar

Joined: Mon Feb 11, 2013 12:46 am
Posts: 5722
thanks for that...did a little more research and found out that its called a 600-102 piercing assembly and was mostly used for
bulk filling....but this one I worked on was not set up for bulk fill...with the exception of the piercing assembly. :?
I still say there was nothing wrong with the original style end cap design..... 8)

managed to find this on another forum during a search.....

The 'Neck in " Variant re-fit

Quote:
Back in the 60's Crosman had a push to re-fit this variant to the "Neck out" design. We received an addendum, plus a number of spare parts/tool, to re-fit these as they came into the shop for performance and safety reasons(see J.T.Fletcher's The Crosman 600 history/manual for reference). Remove the piercing assy and replace the old cap with a piercing cap. The models with the screw thru the tube, disassemble and replace the tube also.
Performance-wise
That piercing pin would act as a restrictor and while firing as fast as you can the pressure would drop off so much by the 10th shot the pellet would almost fall out of the muzzle a couple of feet or so in front of you (a slight exaggeration but not by much).
Safety-wise:
That same piercing pin could become clogged with dirt, CO2 cartridge shavings, etc,leading you to believe you had a dud cartridge, but, would have a pressurized CO2 chamber with no way to vent it out safely. so people would take a pair of pliers and painfully crank the cap off only to have the cap and cartridge fly out during the last couple of turns and lodge in the nearest wall, dog, person.My fav, your customer would crank down on it thinking it didn't pierce, then get the cartridge neck jammed in the piercing assy and wouldn't come out until you easily removed the cap, then, as you tried to dislodge this "empty" cartridge,it would come flying out .Really scares the bejesus outta you. Well at least you didn't have to go find the cap.

Dad was Factory certified in Fairport in the summer of '66, I got to go with him, got a 1 day tour of the factory and even factory trained on the 166, not bad for a 6 year-old, yeah it was cool.

Oh, the piercing caps were interchangeable between the 600, 400 and 160, even the push-to-pierce caps. (reference the associated manuals P/N 600-73)

CGriff


this is the coolest modified 600 I have ever seen 8) 8)

Image

Image

_________________
"A candle loses nothing by lighting another candle"

Image


Top
 Profile  
 
PostPosted: Fri Apr 10, 2015 2:46 pm 
Offline
User avatar

Joined: Sun Jan 18, 2015 10:35 pm
Posts: 300
Location: Winnipeg, Manitoba
That my friend is Awesome!

_________________
Be safe and have fun!


Top
 Profile  
 
PostPosted: Fri Apr 10, 2015 2:50 pm 
Offline
User avatar

Joined: Wed Jul 24, 2013 9:13 am
Posts: 4030
Location: Toronto
Man I want that! How does that barrel detach? I assume it is the only barrel and inserts all the way into the breach and is captured there.
Also like to know that rear stock is affixed... a through screw from the butt but into what? What is that on the end back of the pistol to attach to and how is it attached opt eh pistil frame.....?

_________________
Keep you powder dry and your seals oiled.
Shoot straight and safe.

http://plinkercases.ca/


Top
 Profile  
 
PostPosted: Sun Apr 19, 2015 1:25 am 
Offline

Joined: Mon Sep 03, 2007 7:56 pm
Posts: 186
Location: Sidney, BC.
Hello.....There must be a through the stock bolt that goes into the back to the 600 where there is a cap, that holds the mag. spring in place...Some 600 used a different main tube so you couldn't make a bulk fill out of them..they are like the one you have with the piercing pin in the valve body....You can use a bulk fill cap from a Crosman 150 /160 /180 / 400 etc.and no, not 8 grams CO2 cylinders ....If you want to know about the Crosman 600,....and others Dean Fletcher has books on most of them ....KEN.


Top
 Profile  
 
PostPosted: Mon Apr 20, 2015 12:23 am 
Offline
User avatar

Joined: Thu Feb 02, 2006 11:35 pm
Posts: 3099
Location: Alberta Canada
KEN. wrote:
Hello.....There must be a through the stock bolt that goes into the back to the 600 where there is a cap, that holds the mag. spring in place...Some 600 used a different main tube so you couldn't make a bulk fill out of them..they are like the one you have with the piercing pin in the valve body....You can use a bulk fill cap from a Crosman 150 /160 /180 / 400 etc.and no, not 8 grams CO2 cylinders ....If you want to know about the Crosman 600,....and others Dean Fletcher has books on most of them ....KEN.

IIRC its attached with a machined end cap to accomdate the angled holding bolt. It is one of THE BEST 600 conversions ever done. There also was a poorer Wood version but had the extended tube for bulk fill CO2.
As for the bulk type piercing assy, have had lots. With piercing needle caps apossed and a c clip in between. I used upon longer tubes to accomodate 2 and 3 caplet piercings. Still have a few in my parts box, even a few Cr bulk fill adapters. The ole days :lol: before the birth of HPA....lol.

_________________
May the cry of the pack be with you upon your hunt

Whitewolf


Top
 Profile  
 
PostPosted: Mon Apr 20, 2015 7:27 am 
Offline
User avatar

Joined: Wed Jul 24, 2013 9:13 am
Posts: 4030
Location: Toronto
I wonder if the barrel and fore stock are bayonet mounted to the action or would they have to remove a set/grub screw or two every time to remove and install the co2?

_________________
Keep you powder dry and your seals oiled.
Shoot straight and safe.

http://plinkercases.ca/


Top
 Profile  
 
Display posts from previous:  Sort by  
Post new topic Reply to topic  [ 17 posts ]  Go to page 1, 2  Next

All times are UTC - 5 hours


Who is online

Users browsing this forum: No registered users and 14 guests


You cannot post new topics in this forum
You cannot reply to topics in this forum
You cannot edit your posts in this forum
You cannot delete your posts in this forum
You cannot post attachments in this forum

Search for:
Jump to:  
News News Site map Site map SitemapIndex SitemapIndex RSS Feed RSS Feed Channel list Channel list

Powered by phpBB © 2024

phpBB SEO